

Part 1 laid the foundation: a fresh Kali install, verified hardware, partitioning decisions, and a system that actually boots cleanly into a professional security environment. If you skipped Part 1, go back. What follows assumes you have a working Kali base and nothing else configured yet.
Now the real work starts.
A raw Kali install gives you bash. Bash works. It's also the terminal equivalent of a folding table in an empty room. Functional, technically. But nobody does their best work there. Every serious security researcher, penetration tester, and developer eventually lands in the same place: they stop accepting the default shell environment and start building one that thinks the way they do. This part covers exactly that process, tool by tool, configuration by configuration, until your terminal feels like an extension of your thinking rather than an obstacle to it.
This is the shell layer. No GUI configuration, no IDE setup, no package management frameworks yet. Just the command line, made fast and intelligent.
Why Your Shell Environment Is a Force Multiplier
The Hidden Cost of a Vanilla Shell
Default bash on Kali is a blank slate. No autosuggestions, no syntax highlighting, no intelligent directory jumping, no prompt context showing your git branch or the exit code of the last command. Every time you retype a command you ran twenty minutes ago, every time you cd through five levels of nested directories, every time you squint at a prompt that tells you nothing, you're paying a tax. It's small each time. It compounds across hours.
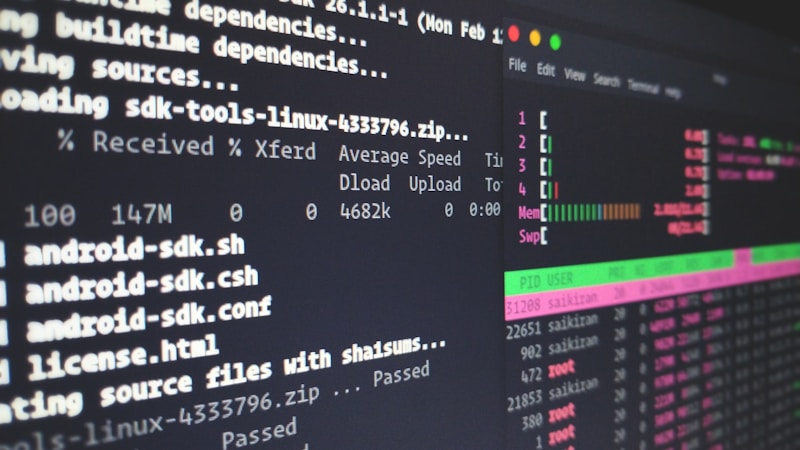
The concept here is cognitive load reduction. Every decision your brain doesn't have to make manually, every piece of context that appears automatically, every keystroke saved by intelligent autocomplete, frees up working memory for the actual problem. In security work, the actual problem is usually complex enough without fighting your tools to get there.
What a Tuned Shell Actually Buys You
That number isn't abstract. Four to six hours of daily terminal time means your shell configuration is one of the highest-leverage investments you can make in your workflow. A tuned environment compounds every single session.
This part covers ten tools that work together as a system: ZSH as the shell itself, Oh My Zsh as the plugin and theme framework, Starship as the prompt engine, fzf for fuzzy-finding everything, zoxide for intelligent directory navigation, tmux for terminal multiplexing, bat as a syntax-aware cat replacement, eza as a modern ls, ripgrep for fast recursive search, and delta for readable git diffs. Each one solves a specific friction point. Together they transform the terminal from a place you tolerate into a place you prefer.
Switching to ZSH: Installation and Making It Your Default Shell
Checking What Ships With Kali
Kali 2022 and later ship with ZSH as the default shell. Before installing anything, verify what you're actually running:
echo $SHELLIf the output is /usr/bin/zsh or /bin/zsh, you're already there. If it returns /bin/bash, you're on bash and need to make the switch. Also worth checking whether zsh is installed at all, even if it's not the active default:
which zsh
zsh --version
Installing ZSH and Setting It as Default
If zsh isn't present, install it:
sudo apt install zsh -yOnce installed, set it as the default shell for your current user:
chsh -s $(which zsh)This modifies /etc/passwd for your user. The change takes effect on the next login, not the current session. Log out and back in to confirm. Run echo $SHELL again after logging back in and it should return the zsh path.
One distinction worth understanding in the Kali context: a login shell is what launches when you first authenticate, pulling in /etc/profile and ~/.zprofile. An interactive shell is any terminal you open after that, pulling in ~/.zshrc. Most of your configuration lives in ~/.zshrc. Keep that mental model clear because it matters when troubleshooting why a path or alias isn't loading where you expect it.
Kali 2022+ Already Defaults to ZSH
If you're on a recent Kali install and echo $SHELL already returns /usr/bin/zsh, skip the chsh step. You're set. Proceed directly to the first-launch configuration and then to Oh My Zsh installation.
First Launch and Initial Configuration
The first time ZSH launches on a system without a ~/.zshrc, it presents a configuration wizard. Don't skip it and don't panic at it. The recommended path: choose option 1 to create a default configuration file, then exit the wizard. Oh My Zsh will overwrite most of this file anyway in the next section, but having a baseline ~/.zshrc in place prevents ZSH from re-launching the wizard on every new terminal.
Oh My Zsh: The Plugin and Theme Framework That Changes Everything
Installing Oh My Zsh
Oh My Zsh is a community-maintained framework that sits on top of ZSH. It manages plugins, themes, and a structured ~/.zshrc layout. Install it with the official one-liner:
sh -c "$(curl -fsSL https://raw.githubusercontent.com/ohmyzsh/ohmyzsh/master/tools/install.sh)"Or with wget if you prefer:
sh -c "$(wget https://raw.githubusercontent.com/ohmyzsh/ohmyzsh/master/tools/install.sh -O -)"
The installer backs up your existing ~/.zshrc to ~/.zshrc.pre-oh-my-zsh and generates a new one. Open that new file and get familiar with its structure. The key section is the plugins=() array. That's where everything gets controlled.
Essential Plugins to Enable Immediately
Two plugins ship as external repositories and need manual installation before you enable them. First, zsh-autosuggestions, which shows gray ghost-text completions based on your history:
git clone https://github.com/zsh-users/zsh-autosuggestions \
  ${ZSH_CUSTOM:-~/.oh-my-zsh/custom}/plugins/zsh-autosuggestions
Then zsh-syntax-highlighting, which colors your commands red or green before you run them:
git clone https://github.com/zsh-users/zsh-syntax-highlighting.git \
  ${ZSH_CUSTOM:-~/.oh-my-zsh/custom}/plugins/zsh-syntax-highlighting
Now update your plugins line in ~/.zshrc:
plugins=(git zsh-autosuggestions zsh-syntax-highlighting z docker python)The built-in git plugin ships dozens of aliases that matter for security project workflows. gst for git status, gco for git checkout, glog for a formatted log view. You'll use them constantly once they're muscle memory.
Keeping Oh My Zsh Lean and Fast
Plugin bloat is real. Every active plugin adds startup overhead. Keep your active list under 15 plugins. Benchmark your current startup time with:
time zsh -i -c exitA healthy configured shell should start in under 300 milliseconds. If you're seeing 800ms or more, something in your plugin list is slow. Disable plugins one at a time and re-benchmark to find the culprit.
Startup Time Is a Real Metric
Run the time zsh -i -c exit benchmark before and after adding any new plugin. A plugin that adds 200ms of startup time on its own isn't worth it unless you're using it in every session. Track the number, not just the feeling.
Starship: A Cross-Shell Prompt That Shows You Everything That Matters
Installing Starship on Kali
Starship is a prompt written in Rust. It's fast because of that, not just marketed as fast. Install it via the official script:
curl -sS https://starship.rs/install.sh | shThen add the initialization line to the bottom of your ~/.zshrc:
eval "$(starship init zsh)"Source your config or open a new terminal. The default Starship prompt is already a significant upgrade over anything Oh My Zsh ships by default. But the real power is in the configuration file.

Nerd Fonts: The Missing Piece for Icons and Glyphs
Starship uses glyphs from Nerd Fonts to render icons for git status, language versions, and context indicators. Without a Nerd Font installed and set in your terminal emulator, those characters render as boxes or question marks. Install FiraCode Nerd Font or JetBrains Mono Nerd Font:
1mkdir -p ~/.local/share/fonts
2cd ~/.local/share/fonts
3wget https://github.com/ryanoasis/nerd-fonts/releases/download/v3.2.1/FiraCode.zip
4unzip FiraCode.zip
5fc-cache -fv
Then set your terminal emulator's font to "FiraCode Nerd Font Mono." In Kali's default terminal, that's under Preferences, then the Appearance tab.
Configuring starship.toml for a Security Dev Workflow
Create the config file:
mkdir -p ~/.config
touch ~/.config/starship.toml
Here's a ready-to-paste configuration tuned for Kali security work:
1[directory]
2truncation_length = 4
3truncate_to_repo = true
4
5[git_branch]
6symbol = " "
7style = "bold purple"
8
9[git_status]
10conflicted = "⚔️ "
11ahead = "⇡${count}"
12behind = "⇣${count}"
13modified = "✎ "
14untracked = "? "
15
16[python]
17symbol = " "
18style = "bold green"
19
20[docker_context]
21symbol = " "
22style = "bold blue"
23
24[cmd_duration]
25min_time = 2_000
26format = "took [$duration](bold yellow) "
27show_notifications = false
The cmd_duration module is the hidden gem here. Set min_time to 2000 milliseconds and Starship will display how long any command taking more than two seconds actually ran. For long nmap scans, gobuster runs, or hashcat jobs, that timing data shows up right in your prompt history. You don't need to remember whether that scan took four minutes or forty.
"The prompt should tell you where you are, what state your code is in, and how long the last thing took. Everything else is decoration."
fzf: Fuzzy Finding Everything From History to Files to Processes
Installing fzf and Enabling Shell Integrations
Two installation paths exist. The apt route is simpler but often ships an older version:
sudo apt install fzf -yThe git clone route gives you the latest version and the install script that wires up shell integrations:
git clone --depth 1 https://github.com/junegunn/fzf.git ~/.fzf
~/.fzf/install
The install script asks three questions: add key bindings, add fuzzy auto-completion, and update shell configuration files. Answer yes to all three. This is the step most people skip, and it's the step that makes fzf actually useful rather than just another binary in your PATH.
The Three Key Bindings You Will Use Every Day
Ctrl+R replaces the default reverse history search with an fzf-powered interactive history browser. Type any fragment of a past command and fzf narrows the list in real time. This alone justifies the installation.
Ctrl+T opens a fuzzy file finder starting from the current directory. Start typing a filename fragment and navigate to it without knowing its exact path.
Alt+C fuzzy-searches directories and drops you into the selected one. It's faster than tab-completing through nested paths when you roughly know where you're going.
Power Patterns: Piping fzf Into Security Workflows
fzf reads from stdin, which means it pairs with anything that produces list output. Kill a process interactively:
kill -9 $(ps aux | fzf | awk '{print $2}')Preview file contents while browsing with bat:
fzf --preview 'bat --color=always {}'Set a faster default command using ripgrep so fzf doesn't walk .git directories and binary files:
export FZF_DEFAULT_COMMAND='rg --files --hidden --follow --glob "!.git/*"'Add that export to your ~/.zshrc. Now every fzf invocation uses ripgrep under the hood. For security work specifically, pipe a list of target IPs, CVE identifiers, or discovered hostnames through fzf to select interactively before passing to the next tool in a chain. It turns flat text output into a navigable interface without writing a single line of Python.
Recommended: PlaudPro AI Voice Recorder
Security workflows generate ideas fast: a new attack path you want to document, a tool chain you just figured out, a configuration note you'll need later. PlaudPro captures spoken thoughts and turns them into organized, searchable notes without breaking your terminal flow. Keep it on the desk during long enumeration sessions. Shop PlaudPro
zoxide: The Smarter cd That Learns How You Work
Installing and Initializing zoxide
Install via apt:
sudo apt install zoxide -yOr via cargo if you want the latest release and already have Rust installed:
cargo install zoxide --lockedAdd the init hook to the bottom of your ~/.zshrc, after the Starship init line:
eval "$(zoxide init zsh)"Source your config. From this point forward, every directory you cd into gets logged to zoxide's database with a frecency score, a composite of how frequently you visit it and how recently you last went there.
Building Your Jump Database Naturally
zoxide doesn't require any manual bookmarking. Just work normally for a day or two and the database builds itself. The z command is the payoff:
1z tools        # jumps to /opt/tools if that's where you've been
2z ctf          # jumps to ~/ctf/current or wherever you work
3z engagements  # lands in ~/engagements without typing the full path
The algorithm picks the highest-scoring match for the fragment you provide. In practice, it learns your patterns faster than you expect
tmux: Never Lose a Session Again
Installing tmux and Understanding the Mental Model
tmux isn't just a terminal multiplexer. It's a session manager, a layout engine, and an insurance policy against the moment your VM freezes mid-capture or your SSH connection drops during a long enumeration run. Before you configure anything, you need to understand how tmux actually thinks about your workspace.
The hierarchy goes: server at the bottom, running invisibly in the background. Sessions attach to that server. Each session holds one or more windows, which work like browser tabs. Each window splits into panes. When you close your terminal emulator, the server keeps running. Your session is still alive. You reconnect with tmux attach -t session-name and everything is exactly where you left it.
Install it with:
sudo apt install tmux -yThat number makes sense once you've used tmux through a single real engagement. Losing a session because the terminal crashed is a problem that only happens once before you commit.
A Sane .tmux.conf From Scratch
The default prefix key is Ctrl+B. That's a reach. Ctrl+A is faster, and if you're coming from GNU Screen, it's already muscle memory. Here's a complete .tmux.conf ready to paste into ~/.tmux.conf:
1# Remap prefix from Ctrl+B to Ctrl+A
2unbind C-b
3set-option -g prefix C-a
4bind-key C-a send-prefix
5
6# Enable mouse support
7set -g mouse on
8
9# True color support
10set -g default-terminal "tmux-256color"
11set -ag terminal-overrides ",xterm-256color:RGB"
12
13# Start windows and panes at 1, not 0
14set -g base-index 1
15setw -g pane-base-index 1
16
17# Status bar
18set -g status-style bg=colour235,fg=colour136
19set -g status-left "#[fg=green]#S "
20set -g status-right "#[fg=cyan]%H:%M %d-%b"
21
22# Split panes with | and -
23bind | split-window -h
24bind - split-window -v
25unbind '"'
26unbind %
27
28# Reload config
29bind r source-file ~/.tmux.conf \; display "Reloaded."
30
31# List of plugins
32set -g @plugin 'tmux-plugins/tpm'
33set -g @plugin 'tmux-plugins/tmux-resurrect'
34set -g @plugin 'tmux-plugins/tmux-continuum'
35
36# Auto-restore sessions
37set -g @continuum-restore 'on'
38
39# Initialize TPM (keep this line at the very bottom)
40run '~/.tmux/plugins/tpm/tpm'
Essential Workflows: Sessions, Windows, and Panes for Security Work
Named sessions are where tmux earns its keep. Instead of a pile of anonymous terminals, you get organized workspaces:
1tmux new -s engagements
2tmux new -s ctf
3tmux new -s recon
For a typical pentest layout inside a session, split one window into three panes: a main shell on the left, a notes pane top-right, and a network monitor bottom-right. Ctrl+A | splits vertically. Ctrl+A - splits horizontally. Resize panes by holding Ctrl+A and pressing an arrow key.
The tmux-sessionizer concept takes this further. Bind a key to a script that uses fzf to list your project directories, then drops you into a named tmux session for whichever one you pick. One keypress, zero context-switching friction. The script is about fifteen lines of shell and it changes how you move between active engagements.
tmux Plugin Manager and Must-Have Plugins
Install TPM first:
git clone https://github.com/tmux-plugins/tpm ~/.tmux/plugins/tpmThen source your config and hit Ctrl+A I to install plugins. tmux-resurrect saves your entire session layout, pane contents included, to disk. tmux-continuum automates that save every fifteen minutes and restores everything on tmux server start.
When your VM reboots mid-engagement, and it will, tmux-resurrect brings back every named session, every split, every working directory. That's not a convenience feature. That's data integrity.
Modern CLI Replacements: bat, eza, ripgrep, and delta
bat: cat With Syntax Highlighting and Git Integration
cat has one job and it does that job without any grace. bat does the same job with syntax highlighting, line numbers, Git change indicators in the gutter, and a built-in pager that doesn't make you hate your life.
Install it:
sudo apt install bat -yOn Debian-based systems, the binary installs as batcat. Alias it properly in .zshrc:
alias cat='batcat'
alias bat='batcat'
The flags worth knowing: --paging=never for piping bat output into other tools without the pager interrupting, --plain to strip line numbers and decorations, and --language=json to force syntax highlighting when the file extension doesn't tell the story. When you're reviewing a captured config file or a script you just pulled off a target, bat makes the structure immediately readable.
eza: A Modern ls With Tree Views and Icons
eza replaced exa when exa went unmaintained. It's faster, actively developed, and the icon support with Nerd Fonts makes directory listings genuinely informative at a glance.
sudo apt install eza -yAdd these aliases to .zshrc:
1alias ls='eza --icons'
2alias ll='eza -lh --icons --git'
3alias la='eza -lah --icons --git'
4alias lt='eza --tree --level=2 --icons'
The tree view is the one you'll reach for constantly during security work. eza --tree --level=2 --icons on a cloned repository or a captured directory structure shows you the entire layout in three seconds flat, without installing tree as a separate package.
Recommended: Protein Bars (1st Phorm)
Long setup sessions and late-night CTF grinds have a way of skipping meals. Keep a box of 1st Phorm Protein Bars on the desk. Twenty grams of protein, real ingredients, and no prep time means you actually eat something between reboots. Shop Protein Bars
ripgrep: grep That Actually Respects Your Time
ripgrep (rg) is grep rewritten in Rust with a default respect for .gitignore, recursive search built in, and speed that makes GNU grep feel like it's searching through wet concrete.
sudo apt install ripgrep -yThe security use cases are immediate. Searching a cloned repository for hardcoded API keys:
rg 'api_key|secret|password|token' --type pyScanning a log directory for a specific IP across thousands of files takes seconds. Searching a large Go codebase for a vulnerable function pattern works without flags or configuration. ripgrep just does it correctly by default.
delta: Beautiful Git Diffs in the Terminal
delta is a diff viewer that makes git diff output readable by humans. Syntax highlighting, line numbers, side-by-side mode, and configurable themes.
sudo apt install git-delta -yWire it into ~/.gitconfig:
1[core]
2    pager = delta
3
4[delta]
5    navigate = true
6    side-by-side = true
7    line-numbers = true
8
9[interactive]
10    diffFilter = delta --color-only
When you're reviewing a security patch or auditing changes between two versions of a tool, side-by-side delta output lets you see exactly what shifted. It's the kind of thing that makes patch review something you actually do instead of something you skip.
Consolidated alias block for .zshrc:
1# Modern CLI replacements
2alias cat='batcat'
3alias bat='batcat'
4alias ls='eza --icons'
5alias ll='eza -lh --icons --git'
6alias la='eza -lah --icons --git'
7alias lt='eza --tree --level=2 --icons'
8alias grep='rg'
Wiring It All Together: The .zshrc Master File
Organizing .zshrc Into Logical Sections
A .zshrc that grew organically over six months is a disaster. You can't read it, you can't debug it, and you can't share it. Structure it deliberately from the start. The sections, in order:
1# ─── 1. Environment Variables ───────────────────────────────
2export GOPATH="$HOME/go"
3export PATH="$PATH:$GOPATH/bin:/usr/local/go/bin"
4export PYTHONPATH="$HOME/.local/lib/python3.11/site-packages"
5export PATH="$PATH:$HOME/.local/bin"
6
7# ─── 2. Oh My Zsh Init ──────────────────────────────────────
8export ZSH="$HOME/.oh-my-zsh"
9ZSH_THEME=""   # Must be empty for Starship to take over
10source $ZSH/oh-my-zsh.sh
11
12# ─── 3. Plugins ─────────────────────────────────────────────
13plugins=(git zsh-autosuggestions zsh-syntax-highlighting fzf)
14
15# ─── 4. External Config Files ───────────────────────────────
16[ -f ~/.zsh_aliases ] && source ~/.zsh_aliases
17[ -f ~/.zsh_functions ] && source ~/.zsh_functions
18
19# ─── 5. Tool Initializations ────────────────────────────────
20eval "$(starship init zsh)"
21eval "$(zoxide init zsh)"
22
23# ─── 6. fzf Bindings ────────────────────────────────────────
24[ -f ~/.fzf.zsh ] && source ~/.fzf.zsh
Order of Operations: What Loads When and Why
Load order is where most broken shell configs live. The rule that matters most: ZSH_THEME="" must be set before Oh My Zsh sources, and starship init zsh must come after. If Oh My Zsh loads a theme before Starship initializes, you get two prompts fighting for the same line.
PATH additions need conditional guards to prevent duplication across multiple shell sessions:
[[ ":$PATH:" != *":$HOME/.local/bin:"* ]] && export PATH="$HOME/.local/bin:$PATH"Benchmark startup time with time zsh -i -c exit. Target is under 200ms. If you're over that, zsh --sourcetrace will show you exactly which file is dragging.
Sourcing External Config Files for Cleanliness
Split aliases into ~/.zsh_aliases and functions into ~/.zsh_functions. Source both conditionally. This keeps the master .zshrc readable at a glance and makes it easy to share just the aliases file without exposing machine-specific environment variables. It also means you can symlink individual files from a dotfiles repository without replacing the entire .zshrc on every machine.
Your Part 2 Setup Checklist
What's Next: Building the Development Environment Layer
Part 2 started with a bare ZSH install and ended with a shell environment that's faster, more readable, and more organized than what most developers run on their primary machines. You have a prompt that shows you what matters, fuzzy search baked into every command, a session manager that survives VM reboots, and CLI tools that actually respect your time.
Part 3 moves to the layer underneath the shell. Language runtimes and version managers: pyenv for Python, nvm for Node, rustup for Rust, and the Go toolchain installed cleanly without polluting your system paths. This matters specifically in security tooling contexts because the ecosystem doesn't agree on Python versions. One tool requires 3.9. Another requires 3.11. A third was written in 2019 and breaks on anything above 3.8. Version managers solve that without requiring separate VMs for each tool.
Later in the series, Part 5 covers Docker and containerized tooling, which takes the version isolation problem to its logical conclusion. But you need clean runtimes on the host before containers make sense.
If you've already customized your Starship config or built out a .zshrc structure that differs from what's here, share it. The setups that come out of real daily use are always more interesting than the ones built for tutorials. Bookmark the series now so Part 3 lands in your feed when it publishes.
Recommended: BCAA (1st Phorm)
Late-night setup sessions and long study blocks are easier on your body when you're staying hydrated and fueled. 1st Phorm's BCAAs mix into water and keep muscle recovery moving during the hours you're grinding through config files instead of hitting the gym. Shop BCAA


